Sag
Checking your Sag
Checking your sag is one of the most crucial suspension adjustments you can make to help your bike perform the way it should. This can have an effect on the way it corners and how it handles. That being said, it is probably the least checked aspect of your bike!
Here is step by step instructions on how to check your sag!
The first part to checking your sag is having all the right stuff. Here is what you’ll need. A friend, bike stand, a pen, piece of paper, measuring tape (mm preferably), hammer, long punch (or long standard screw driver).
1. The first measurement will be of the fully extended rear suspension.
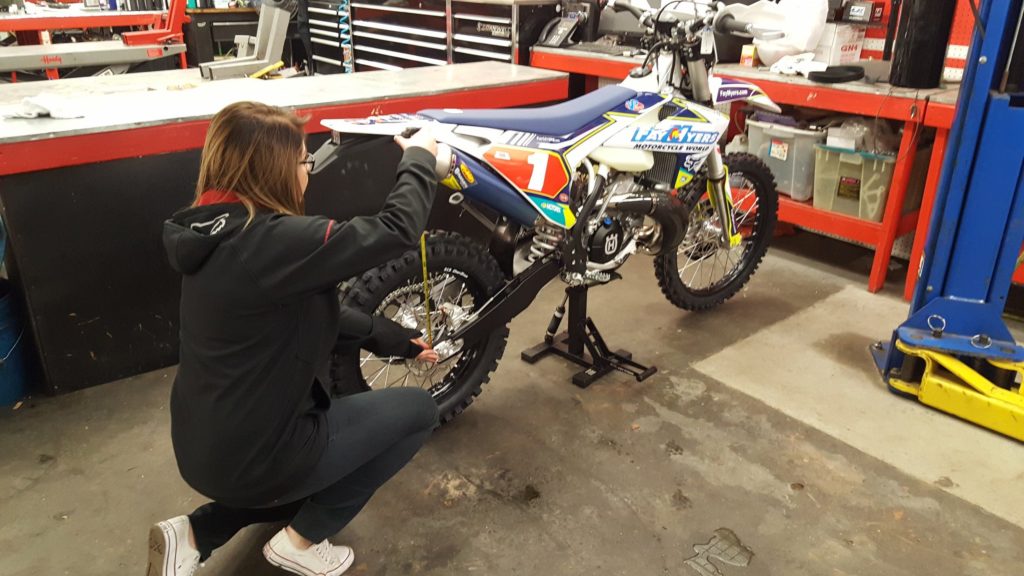
Set your bike up on the stand so the rear wheel is off the ground. I like to find two spots that you will use for all the measurements. I use the small ledge on the rear swingarm by the axle block and the lower edge of the exhaust pipe exit. Take this measurement and write it down, you will use this measurement to get all of your sag numbers.
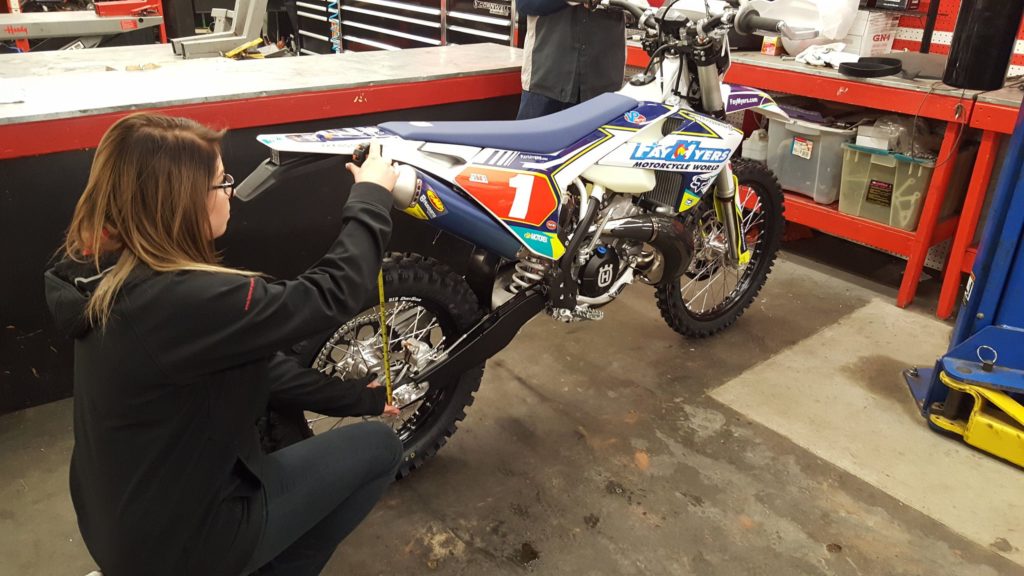
2. The next measurement we will take is called static sag, this is where your buddy will come in handy.
Holding the bike with no stand have them push up and down on the seat and let the suspension settle. Take your next measurement using the same points you used above. Write this number down. Next, lift up on the rear fender and gently let the bike settle down, do not push down on the seat. Take your measurement. Now, take these two measurements, add them together and divide by 2. This will give you the measurement you want to use to check your static sag. To get your static sag number, take your fully extended measurement and subtract the measurement you just took from it. This will give you your static sag.
For Example:
Fully Extended Measurement = 500mm
First measurement under it’s own weight after pushing down on the rear seat = 473mm. Your second measurement you took after you let the bike settle under it’s own weight = 477mm. Take 473 + 477 = 950 / 2 = 475mm
500mm – 475mm = 25mm You have 25mm of static sag.
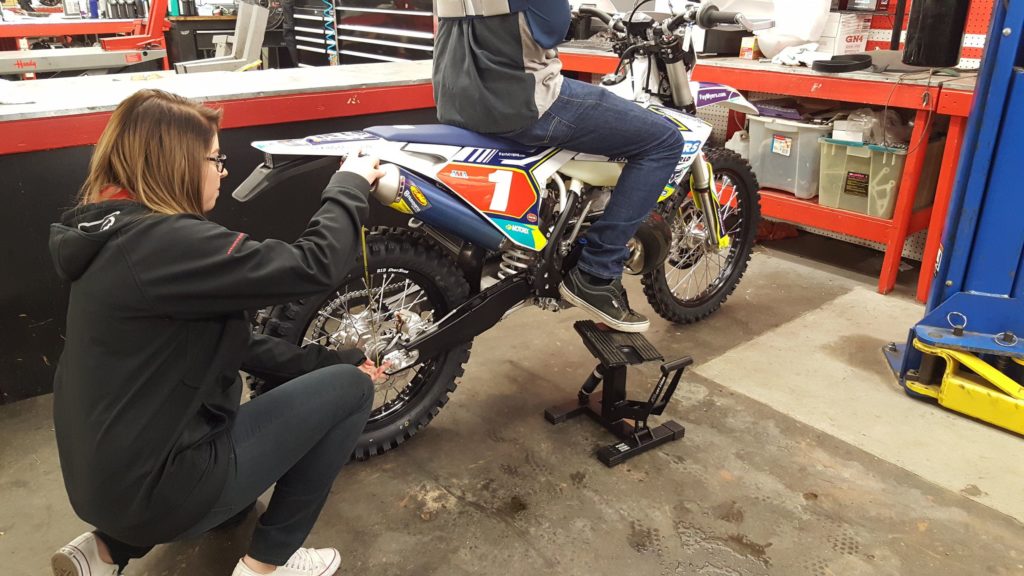
3. Next we will check your race sag.
You’ll need your buddy again. You will need to sit on the bike while it is in the ground, bounce up and down on it and make sure it is settled. It’s best to stand on the pegs while taking this measurement but then you’ll need to find another buddy to hold the bike straight up while you stand. Another thing to do to get your most accurate measurement is doing this with the rider in full gear! This isn’t always the easiest so you can sit on the bike and use the stand you were using as a balance point so you don’t fall over. You need to sit in the correct position, don’t put your butt over the rear fender, scoot up to the tank. Have your friend take the measurement, write this number down.
Here is how your next measurement will play out. Let’s say your measurement on this one was 400mm for ease. Now to calculate your race sag you will need to take your fully extended measurement and subtract your rider measurement.
500mm – 400mm = 100mm This amount is your race sag.
A good rule of thumb is 25mm of static sag and 100mm of race sag for modern linkaged bikes. If you ride a KTM with the PDS rear shock I like to see 35mm of static sag with about 115mm of race sag. If you are unable to take the measurement fully geared up try to hit about 5mm under the above, so 95mm of race for linkage and 110mm on the PDS.
4. Let’s say your numbers aren’t hitting exactly where you need to be.
You’ll need to adjust them. Let’s say your static sag is too little, you’ll need to loosen the tension on your rear spring using the pre-load collars on your rear shock. If your static sag comes in too low, you need to tighten it to get the desired sag number. Make any adjustments you need to get your static sag to the desired number. Once the desired static sag number is reached, you will now need to re-check your race sag.
5. Here is where all of those numbers tell you if your spring is too stiff or to light.
Let’s say you get your static sag set exactly to 25mm, when you re-check your static sag your race sag number comes in at 115mm. This is telling me that the spring is too light. You would have to increase the pre-load adjustment to get your race sag number and that will decrease your static sag number. In reverse, if your race sag number comes in at 85mm, this tells me your spring is too stiff. You would have to take pre-load away from the spring to get to your desired race sag number. This is when you need to bite the bullet and call me for new springs, don’t do just the rear. To make your bike perform the way it should you will need to do the fork and shock springs. This is not exact science, if you are a mm or 2 off here and there it’s fine, this is a good baseline for getting your bike set up for you so it operates the way it was intended!